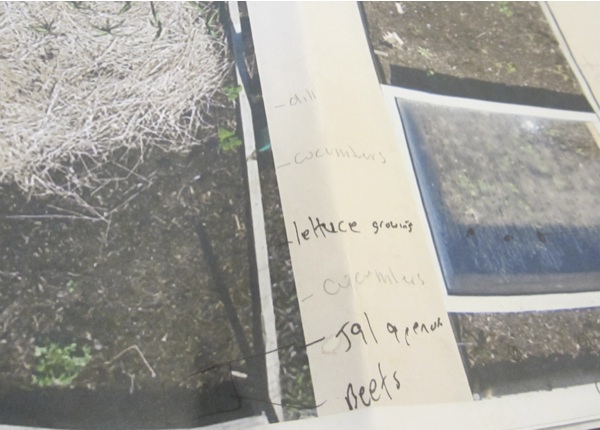
Warning: mkdir(): No such file or directory in /var/www/vhosts/oneidatrail.com/httpdocs/app/plugins/photo-gallery/framework/BWGOptions.php on line 371
Homestead Archives - Oneida Trail
Menu

Compost Binning

Feels Right

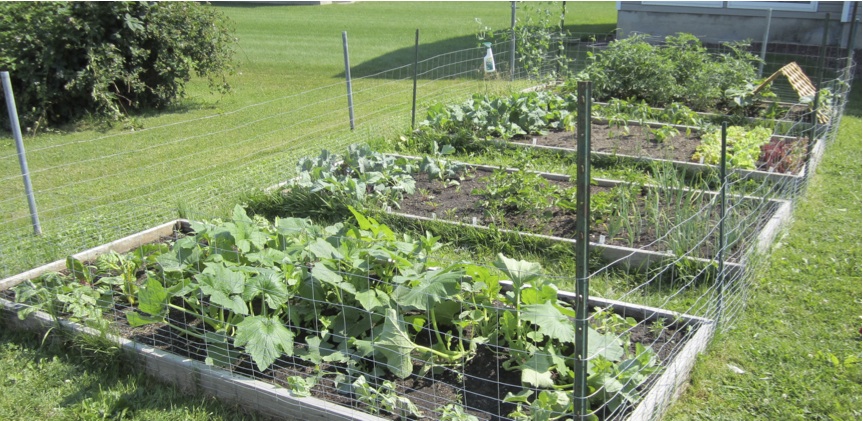
Everyday, composting is vindicated; it feels right. Michelle and I marvel how we never waste any food and all organic matter stays on our property. The most important take-away from my permaculture design course was, “…if nothing else, go home and make soil.”

Gun Jumping

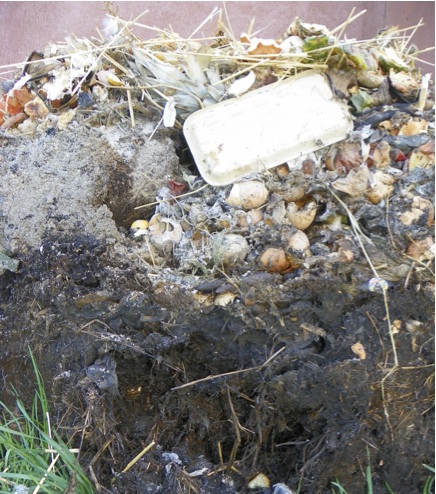
Gazing out, we observed massive heaps of un-composted food scraps scattered on our garden beds from our compost bin. Chris defeatedly states, “This isn’t right, is it?”

Preparing to Turn the Heap

Materials List:

  • Compost bin(s)
  • Containers in house

Game Plan:

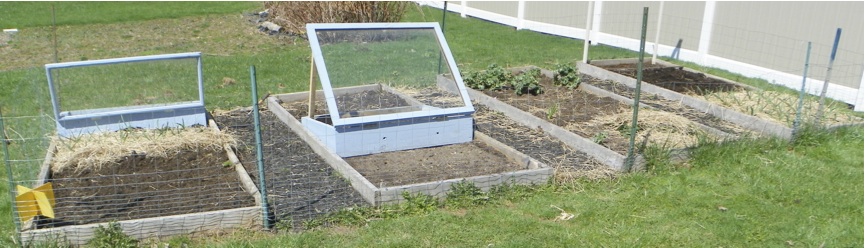
  • Have a place for food scraps
  • Location near house exit
  • Future: change to three pallet bins

Wasting a Resource

No food enters our garbage. As our neighbors pile countless garbage cans out to the curb every week, we put ours out once every three weeks, mainly filled with food packaging and … dog poop.

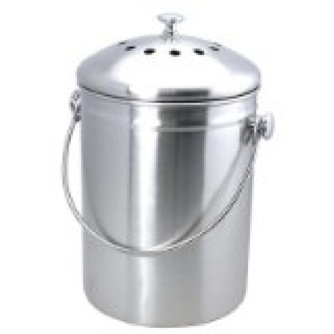
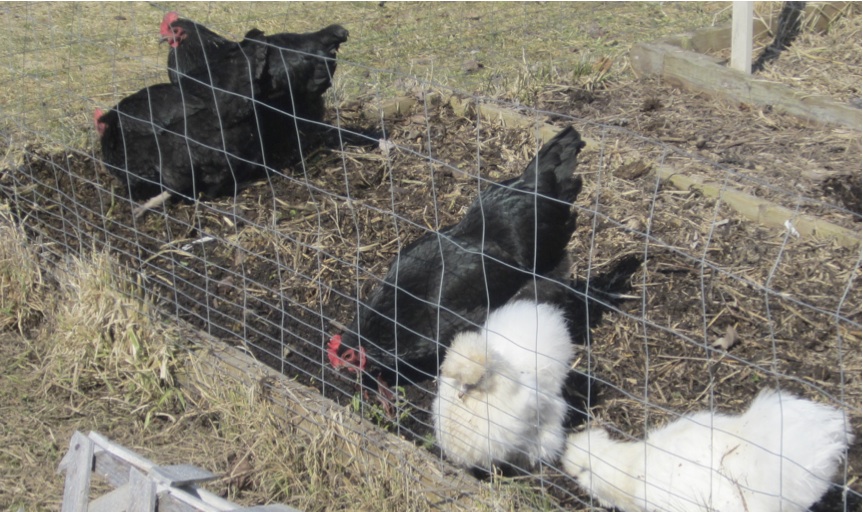
First, our food scraps go through phasing. Leftovers are given to the dog or cut up for the chickens. Remaining compost goes to our worms. Overflow food goes to the compost bin and eventually back to our garden. We recently bought some nicer steel countertop compost bins after our plastic containers broke.  We have one container for chicken scraps and the other is for the worms and compost bin. In truth, we’d like to restrict putting out the garbage to once a month if at all. All this being said, we do have a lot of recyclables each week.

Countertop Bin: Smudgy surface but built to last.

To fully control our waste, our goal is to compost the dog poop separately and carry more canvas baggies for veggies at the market as well as buy only food with compostable materials. As permaculture states, “there is no such thing as waste;” we just need further adjustments to convert all of our waste streams into a resource.

Marjory the Trash Heap: Fraggle Rock

We bought an Exaco Thermoquick 110 gal. Composter. There wasn’t a tag on the unit, so we picked up the $80 unit for $25.  At the time, I thought we got, as mom would say, “the deal of the century.” In retrospect, it’s a plastic piece of shit that is already falling apart after three years and the manufacturing, quality, and material of the product goes against our environmental and resiliency values. I want to stop buying products with short-term futures being the landfill. All products should have deconstructable and recyclable components.

The literal “breakdown” of compost plastic compost bins:

  • One isn’t enough. You have to stop feeding it organic matter to let it finish its thang; having one is misleading.
  • Plastic bins contradict one’s intent.
  • Certain plastic bins will break apart over time.
  • Compost needs to breathe; plastic design makes this hard.

We consider ourselves compost beginners still. We are still trying to get the right brown and green ratios, and we don’t have the proper three-bin system with proper air ventilation. We did flip the compost over several times, but it’s a lot of work with the plastic bin setup, and the outcome wasn’t ideal anyway (I believe the pallet system or tumbler mitigate this process). I’m looking for an easy maintenance system. View the resources below for helpful sites about composing, pallet bin construction, and proper ratio management. Although on the right path, adjustments remain.

The reins are ours,

Chris

Reflections, Hindsight, and Alterations:

  • Build three bins out of pallets instead of plastic ones.
  • Make sure it’s converted from food scraps before throwing it on your garden.
  • Get better at mixing brown and greens to get the right carbon to nitrogen ratios.
  • Place compost bin closer to our house’s entrance/exit.

Resources:

Categories: Food, Permaculture

Establishing a Garden

<img class="wp-image-637 size-full" src="http://www.oneidatrail find out here now.com/app/uploads/2014/04/garden-pic.jpg” alt=”” width=”863″ height=”421″ srcset=”http://www.oneidatrail.com/app/uploads/2014/04/garden-pic.jpg 863w, http://www.oneidatrail.com/app/uploads/2014/04/garden-pic-300×146.jpg 300w” sizes=”(max-width: 863px) 100vw, 863px” />
Garden Established

Garden Resurgence

Soul-comfortingly, we reinstated garden space where my grandmother used to have her garden. Constantly, I’m drawn back to the skills and homesteading choices of her generation. Where did so many baby-boomers and Generation X people go wrong? Oh yea…selling method marketing began in their generations.

Poop Panic

With a truckload of raunchy smelling horse manure, Michelle stares wide-eyed at Chris and says, “We got to dump this in the woods.”

Materials List:

  • Framing Lumber: 2x6s: Cedar, un-treated & rot resistant… or not or Hugelkurtur beds
  • 25 Exterior screws: 3”
  • Soil: Green Compost, Municipality’s Compost, Local Manure
  • Fence Posts
  • Rabbit or Deer Fencing
  • Cardboard

Tools:

  • Drill/Impact Driver
  • Measuring Tape
  • Cutting Saw: circular saw, miter saw, etc.
  • Level

Game Plan:

  • Use un-treated wood: cedar would be nice…
  • Provide protection (grid setup easy to fence in)
  • As beginners, have a large but manageable space
  • Use raised beds: neat, provides moisture retention, easy planning
  • High sunlight location during the day
  • Mostly leveled surface
  • Four raised beds: 4’ x 10’

Savvy Salvaging

First, we scored some old framing lumber from Pa. He assured us it wasn’t pressure treated. They were pretty beat up non-cedar 2x6s, so they probably won’t last very long, but we couldn’t beat the “price.” After three seasons, they are still well in tact. We decided to create four 4’ x 10’ beds. Four foot is a little wide in retrospect; I’d go with 42” wide beds if I did it again.

Trick: Put cupcakes near garden bed project. Associate cupcakes with garden work.

In a maximized sun location, we setup a board and put the level on it to gauge the land’s tilt. It was tilted slightly, so we shoveled out one end a bit to get it close—we didn’t worry too much about being completely level. Then we drilled and screwed the boards into each other: two screws per joint.

Free Manure

On craigslist, we found someone giving aged horse manure for free with a nominal charge to dump it on your truck or trailer, so we borrowed pa’s truck and headed over. It turned out to be an old friend from high school, so the dumping of the shit was…free. =). Make sure the compost is aged for at least a year—two years to be safer. It was still really stinky, and we had a massive panic attack that we got the wrong stuff and almost tried to dump it in the nearby woods. Thankfully, it ended up working very well when we mixed it with peat moss and humus. Oh yea! Make sure you put, layer, and water down some cardboard to smother the grass before adding your soil. Don’t get tricked into buying fabric sheets.

We were weed-whacking the walkways for a while. This was dumb, so we layered wet cardboard then topped it with woodchips from our municipality’s composting service. It’s a nice organized look. Me likes!

Upgrades: Mulched walkways, fitted cold frames, and straw weed cover.

We initially didn’t plan on having a fence, but the rabbits struck quickly in the game, forcing us to reconsider. Deer are not an issue here, so we were able to buy some fence poles off of craigslist and bought some rabbit fencing from the hardware store. We haven’t had a problem since. The rabbit fence is short enough for us youngsters to hop over, but we did extend it in one area with a moveable stake that opens the area.

Haha, B!@#@! We win this time!

We changed from graph paper to garden bed pictures to organize our crop rotation and planting. Take pictures then crop and scale the images to one page. Then you can just write where and what you planted. We change pen color to delineate a different planting time in the season. Pictures are a great way to document your growing season and plant maturity rates during the year.

Use an image editor or Preview to document and manage your plantings.

This year, I let the chickens do some of the work. Although a slight charade catching them (as always!), they were placed in the beds to till the area and find some slugs. The next day I added our somewhat finished compost from last year and they did a solid job spreading it out.

Spring: Chickens digging up slugs, spreading compost, and tilling beds.

The reins are ours,

Chris

Reflections, Hindsight, and Alterations:

  • Permaculture: Place garden in a high traffic area. For example, between your driveway and front door to maximize interaction. Pick stuff for dinner on your way in! It’s not a trudge to the corner of your lot to maintain your garden.
  • Permaculture: Use Hugelkurtur beds – woody debris and logs underneath layered organic matter. This skips the wood framed beds, saves money on materials, and utilizes local shrub & fallen tree waste (if applicable in your area).
  • Permaculture: Use more synergistic plants and food forest layouts.
  • Do 3.5’ wide beds: otherwise, it’s a pretty large space to hop over.
  • Instead of getting the manure, peat moss, and humus, we should have just gotten yards of certified compost from our municipality service (OCRRA compost). It would have been cheaper and less work. They offer wood chips to cover your plants and prevent weed maintenance, too! $15 for six yards of either compost or wood chips; you can mix and match. A yard is about a truck bed load.

Resources: