Initial Conversations
“Yack, yack, yack,” said the subfloor generic lipitor.
“Wait a minute. What do you mean?” responded Chris.
“Bolts, maybe.”
“Maybe?”
“Sure.”
“Have you heard of steel hold downs? What are they?”
“Ya, ya, all the time. They’re steel. They hold down stuff, ya idgit.”
“I give up.” Chris concluded.
Thermodynamic Obscenities
Common sensibly, fastening your house to the trailer needs to be well engineered and figured out. After consulting countless tiny house builders’ experiences, I found 2cycle2gther’s article and the Tiny House Blog’s Phase 1: Subfloor Sandwich System to be extremely helpful. Although we wanted to incorporate that precious 6 inch space between the steel trailer’s framing members, Michelle, a building science graduate student, informed me that steel framing (studs) destroy your insulating capacities where you’d want it: under your toes in the winter. Joe Lstiburek, building science guru, states, “insulating between steel studs is a thermodynamic obscenity.” Because there’s no way to fully enclose the trailer’s hitch from the elements, the trailer frame space wouldn’t be a part of our subfloor.
Redundancy Employed
Exemplifying redundancy, we’re combining an altered sandwich system with 2cycle2gether’s sheathing to trailer screwing as well as screwing the entire subfloor to the trailer with Teks #12 (wood to metal 2 3/4 inch screws). We will also weld 16 bolts to the trailer to hold down the sill plate and entire subfloor to the trailer. No chances have been taken! Why choose some approaches when you can employ every single one?
Longest Sandwich Creation of My Life
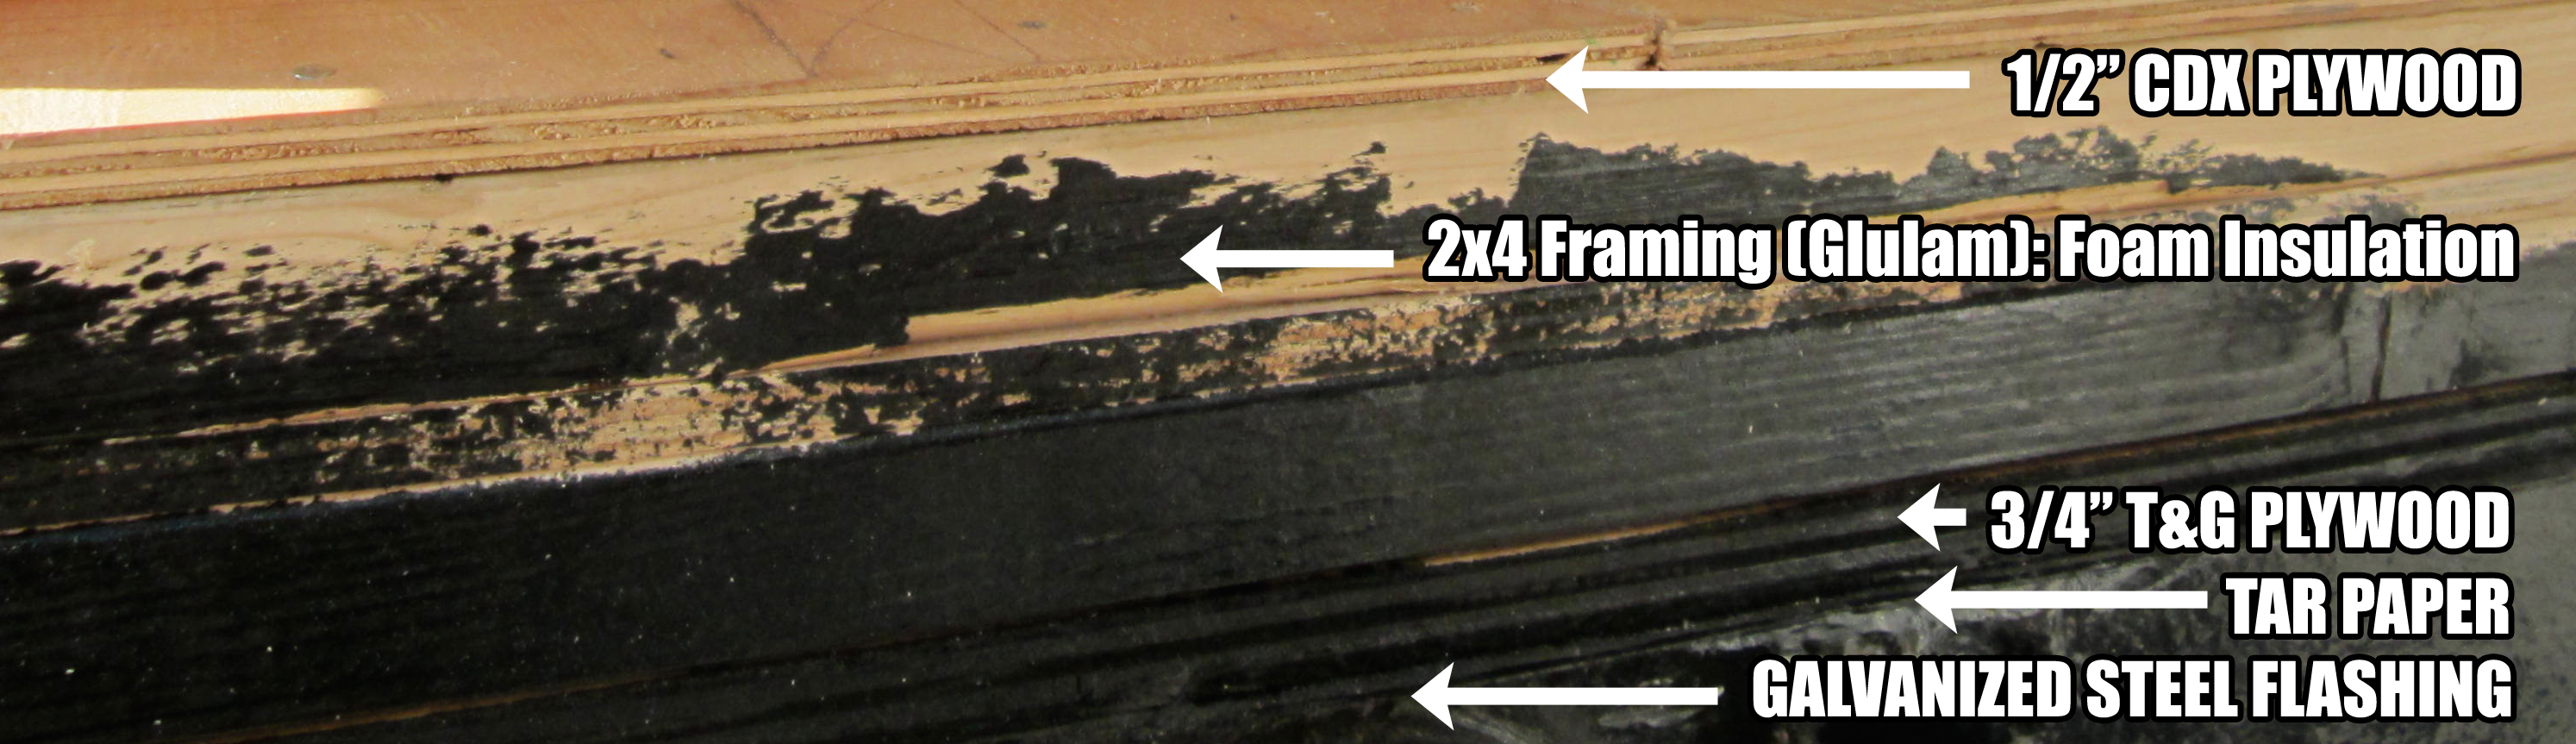
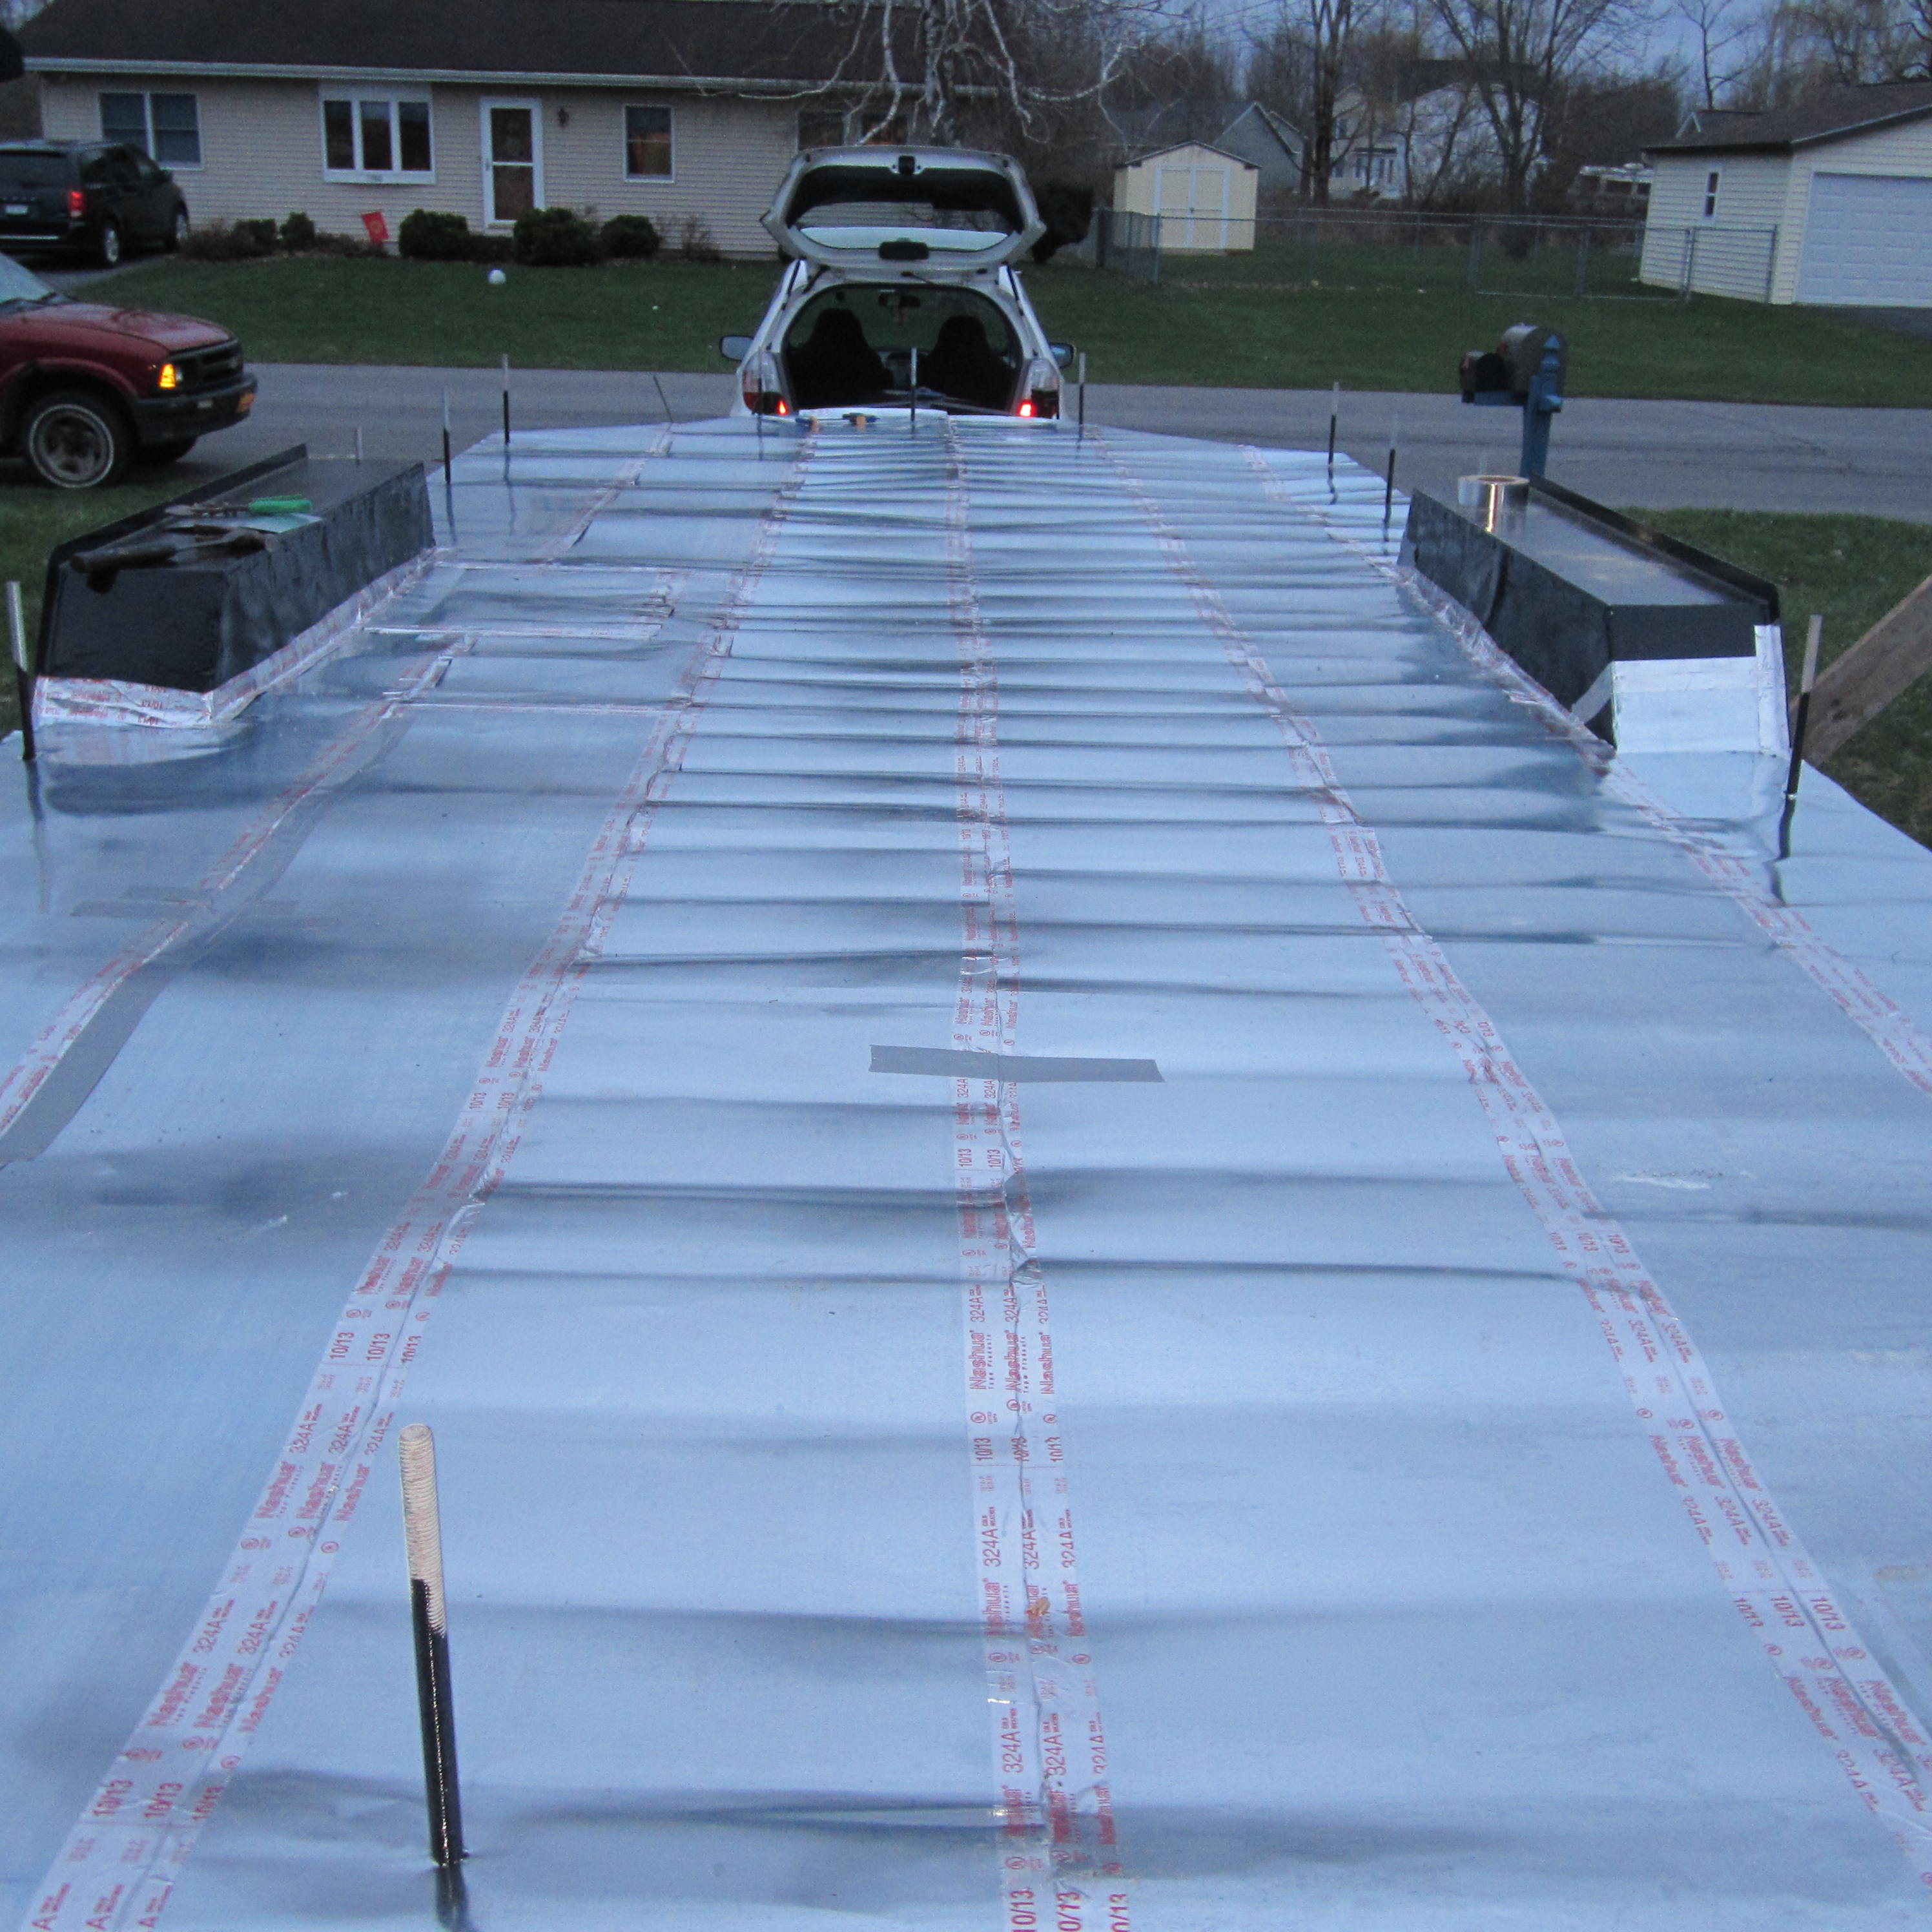
Bottom Bun: Galvanized Steel Flashing
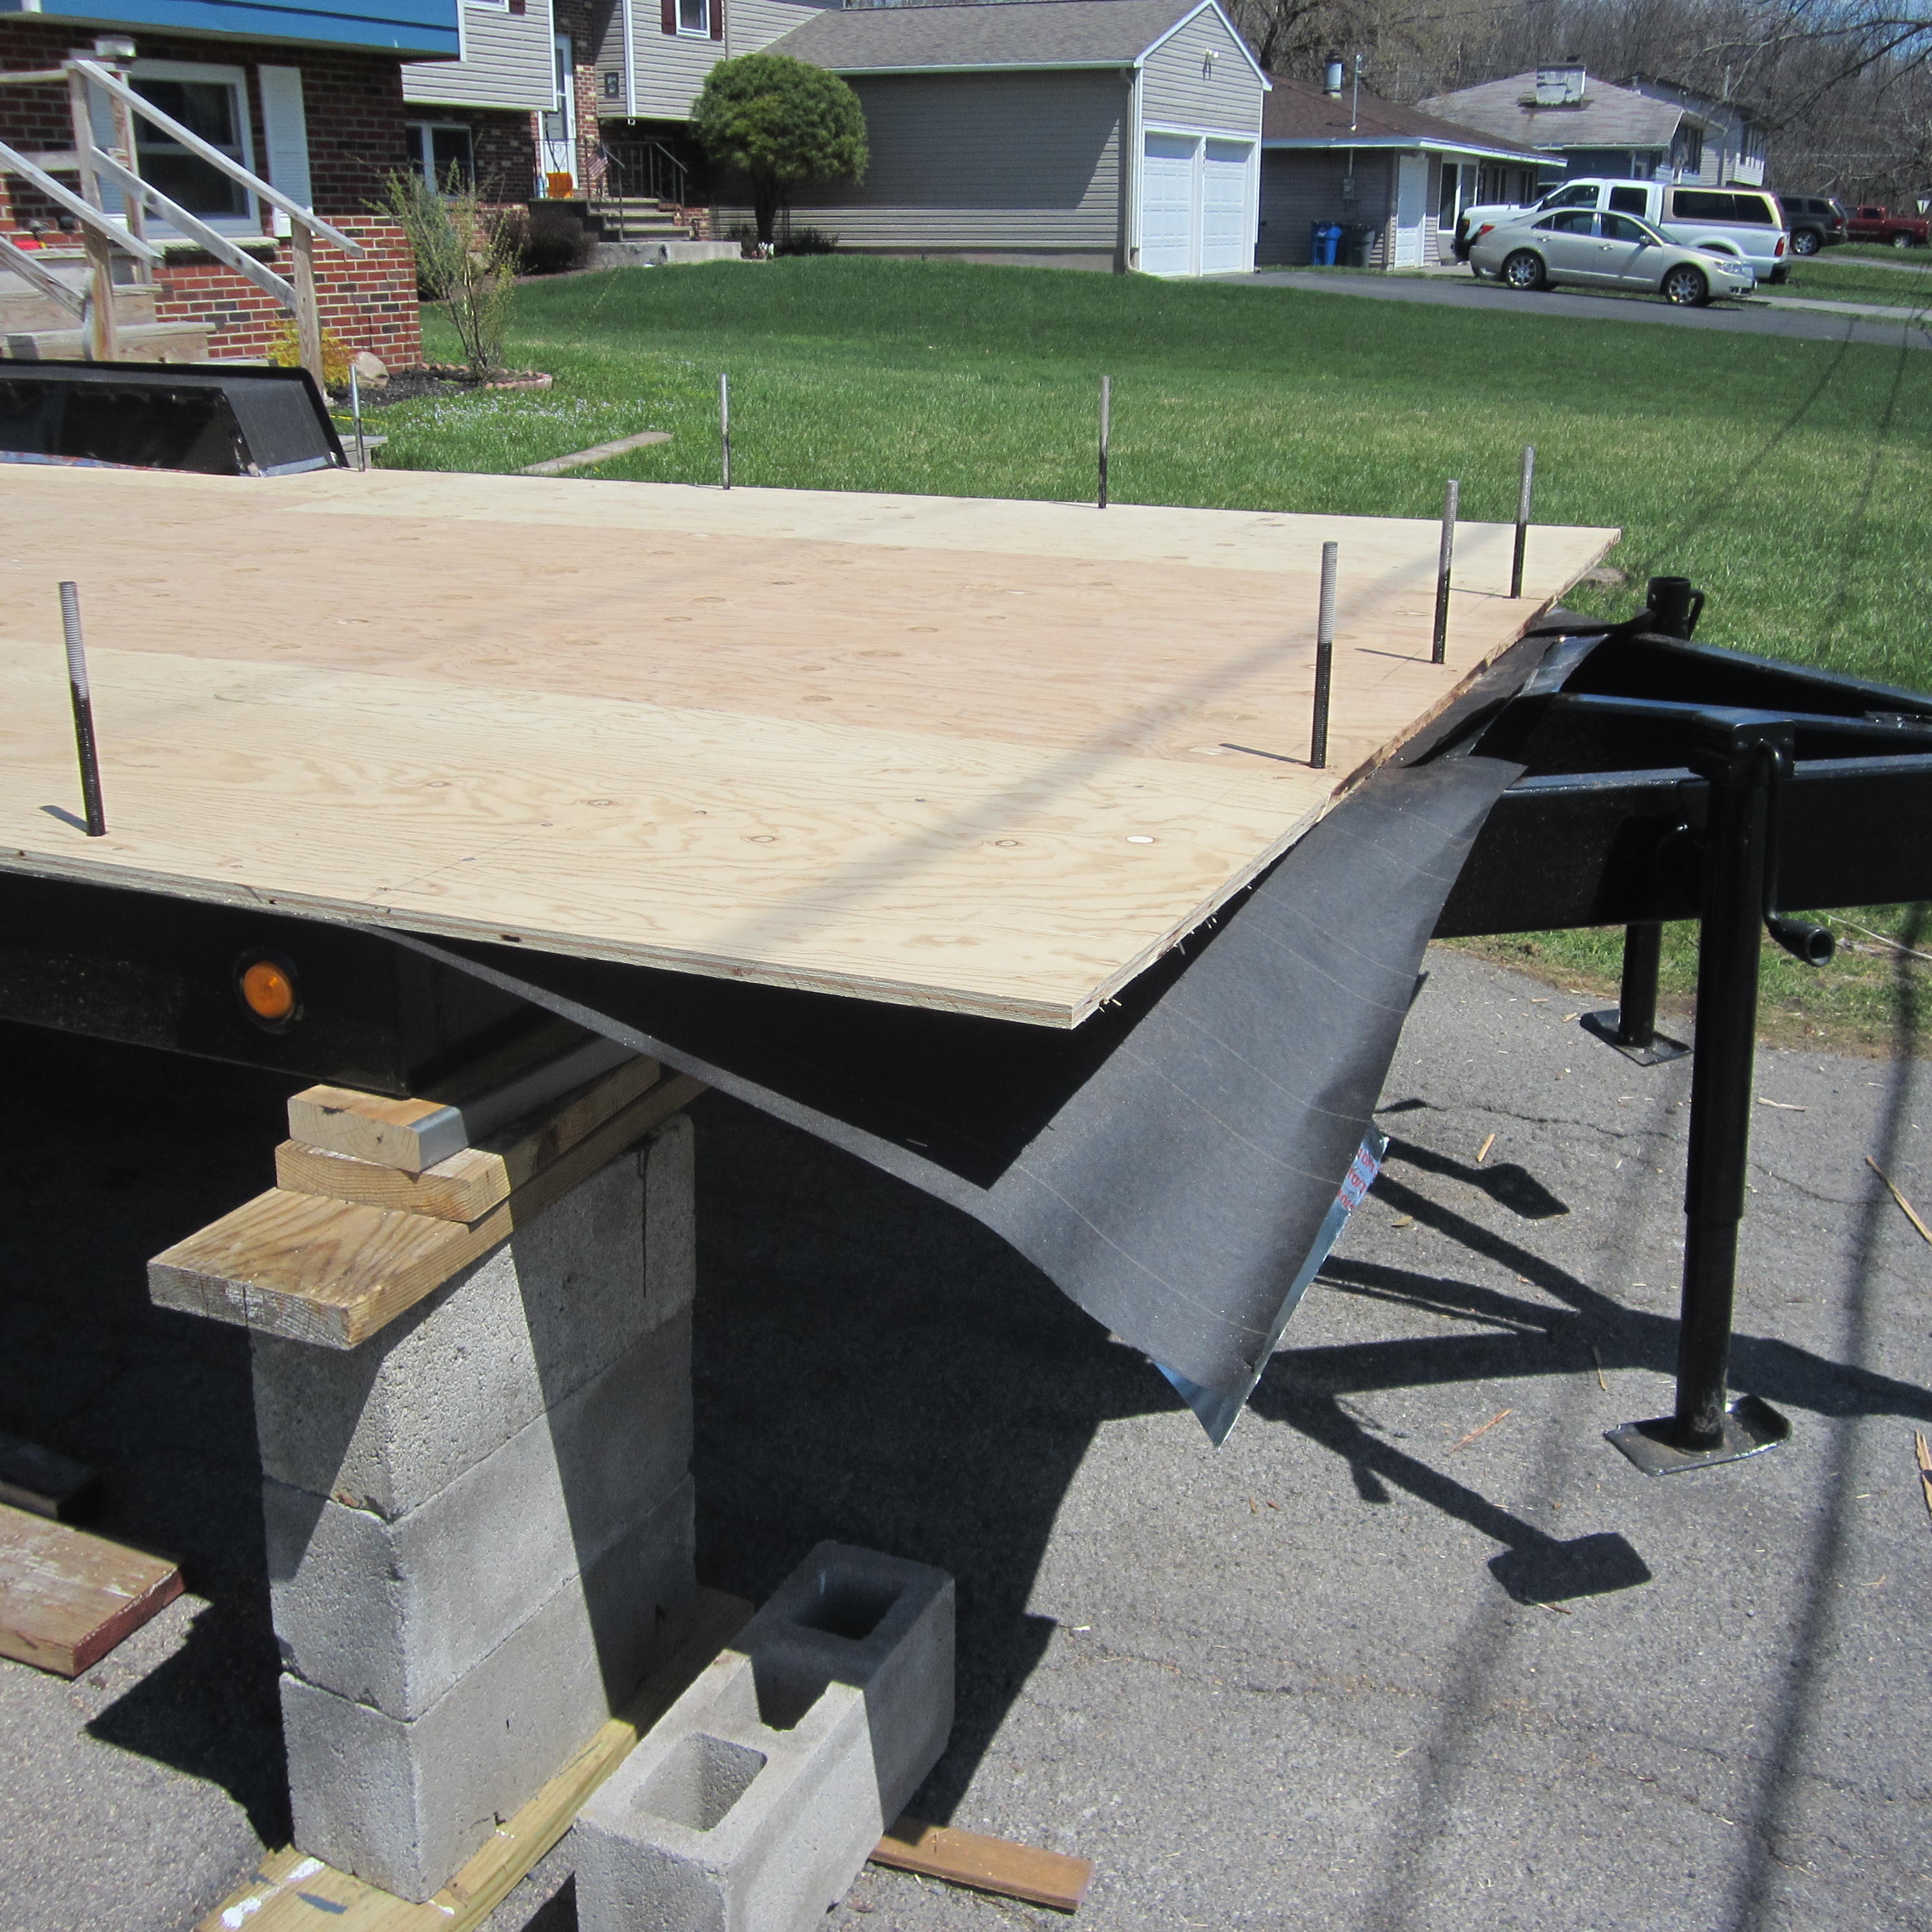
The bottom bun of our subfloor is galvanized steel flashing (seemed like the stronger and better option than aluminum although it was a little more pricey). As I understand it, the flashing will keep out insects and provide some water protection. You can skip the flashing and paint the 3/4 inch plywood layer with a strong and nasty marine grade of paint…if you’re into nasty. What’s strongly stated with flashing types is aluminum reacts poorly to the chemicals used in pressure treated lumber. Our bottom T&G 3/4 inch plywood is treated, so aluminum was a no go; however, galvanized steel isn’t flawless according to the web, so for safety, we used tar paper in-between the plywood and flashing. As always, better safe than sorry.
Portobello Slider: 3/4 Inch T&G Plywood
The 3/4 inch tongue and groove provides a lot of structural integrity. Having it or one side of it treated supplies extra durability if water penetrates.

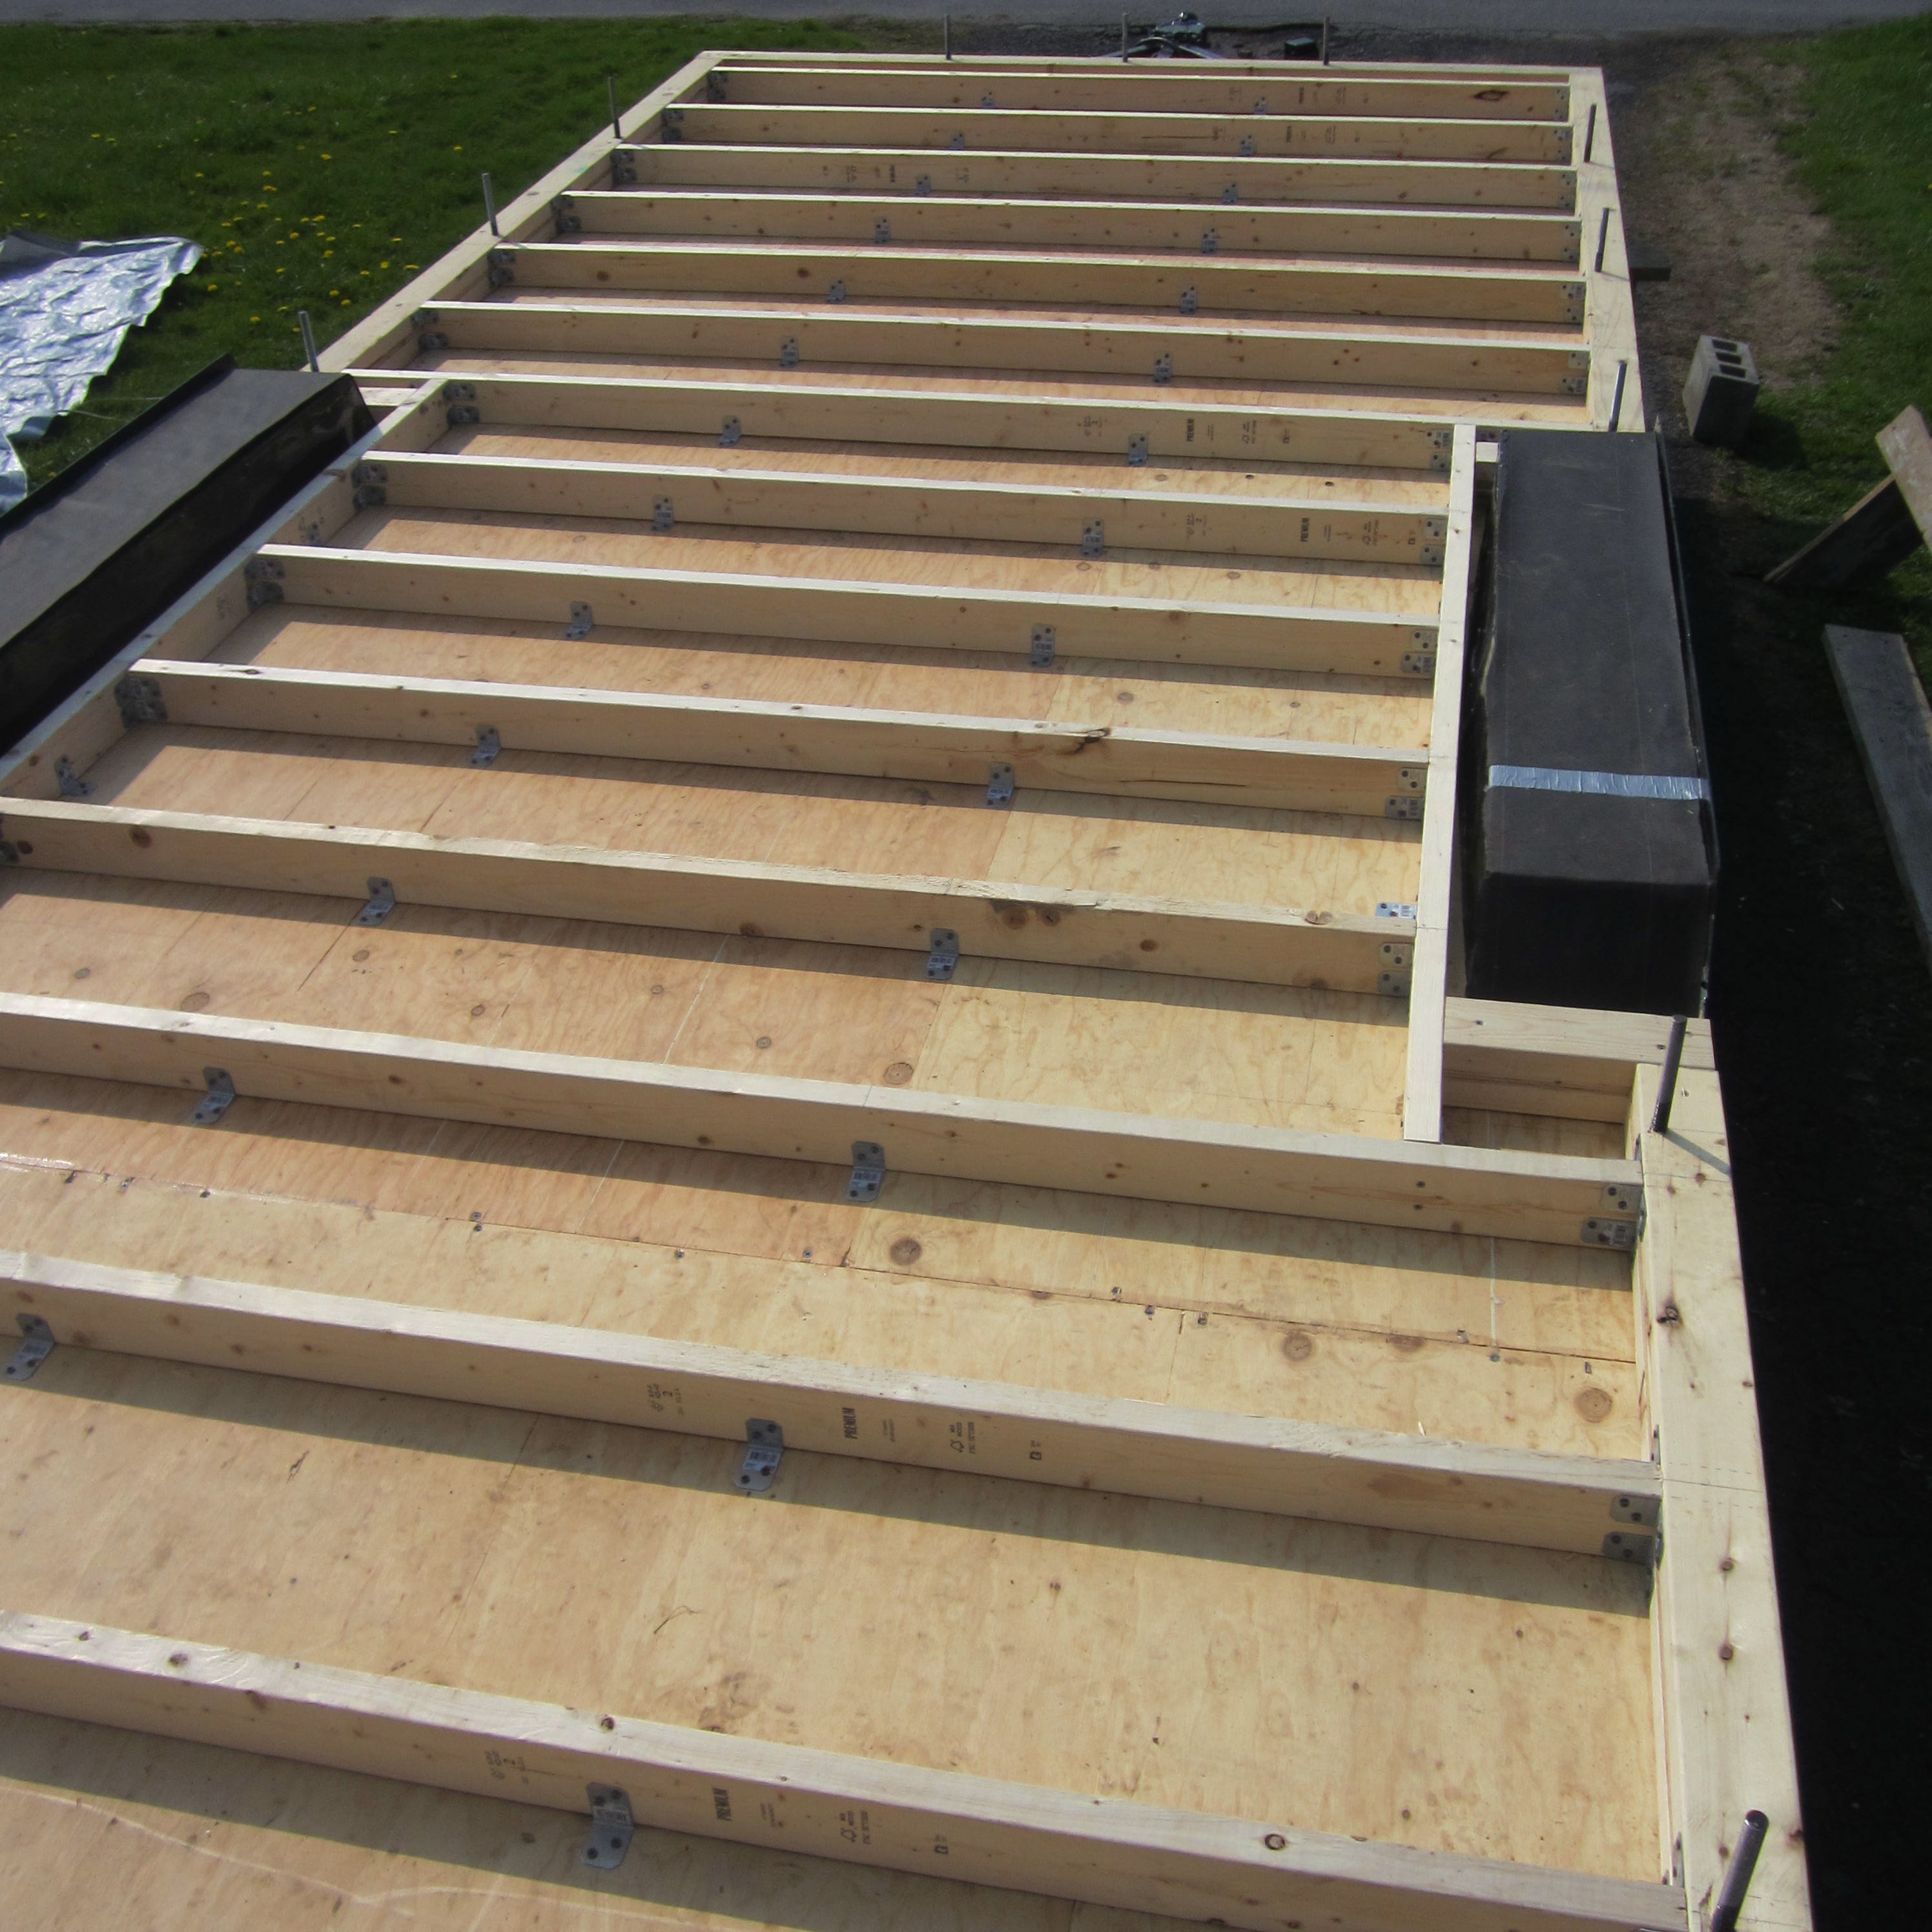
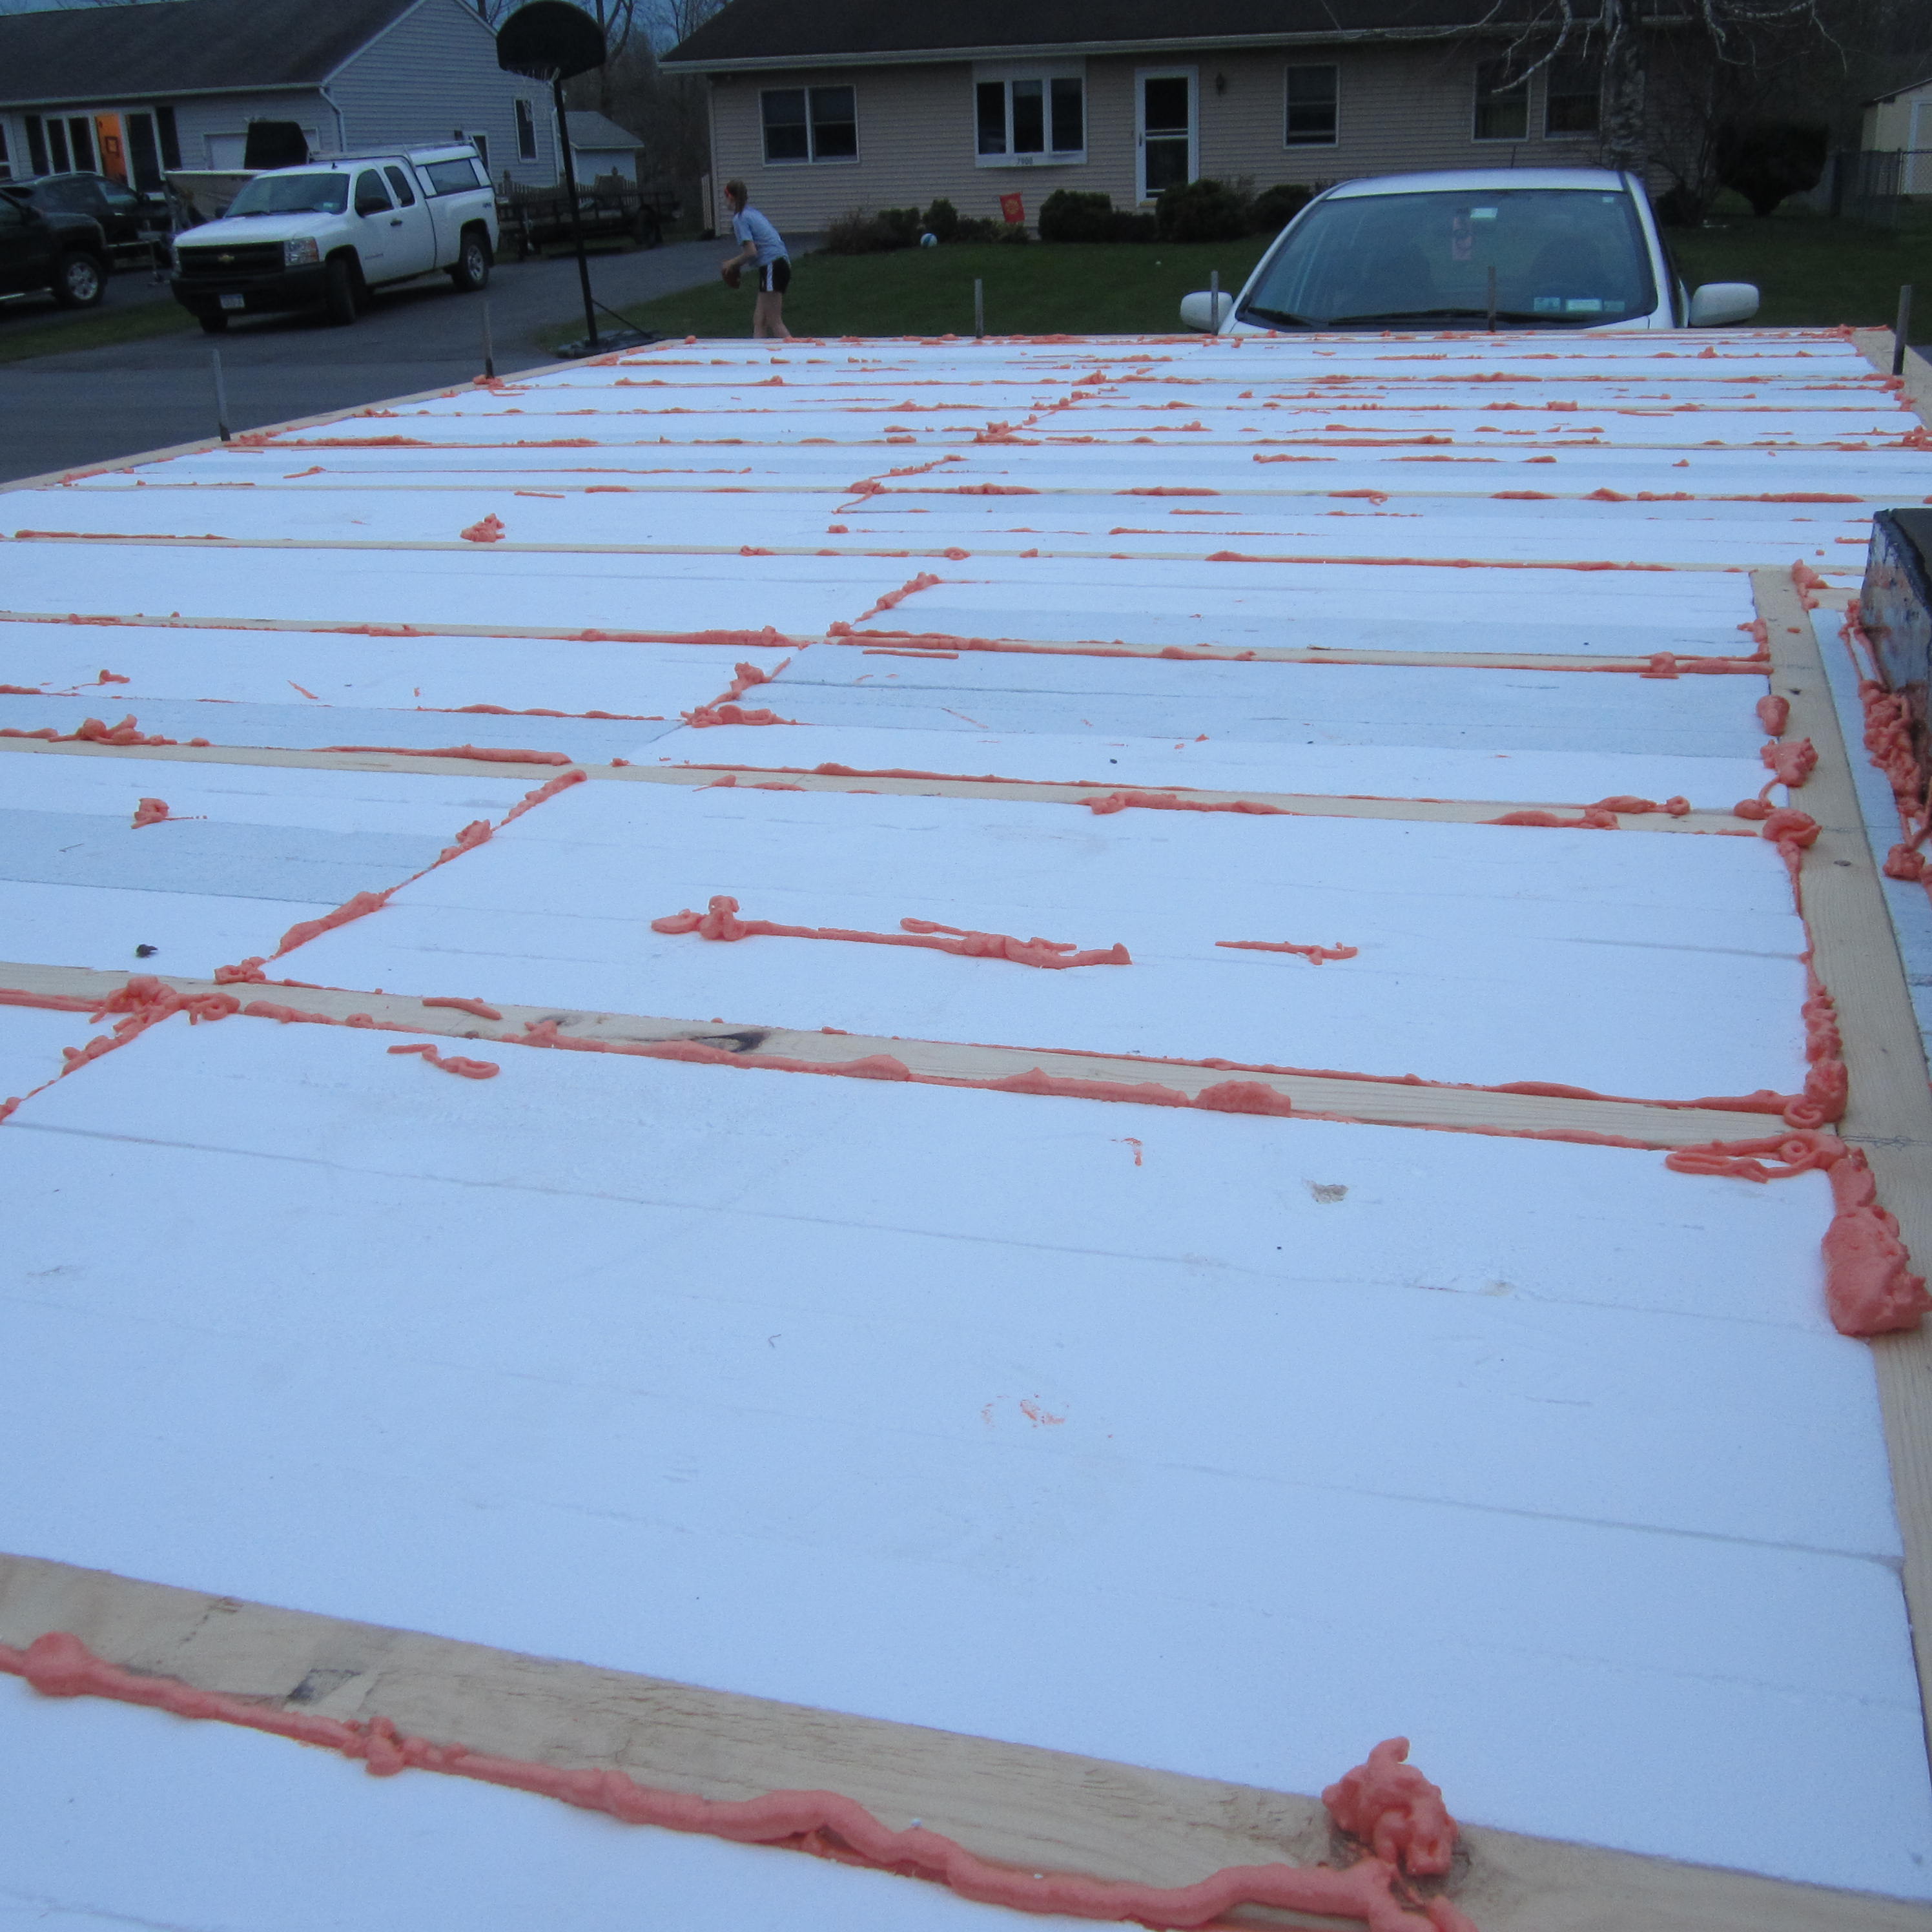
Tomatoes and Pickles: Glulams and Foam
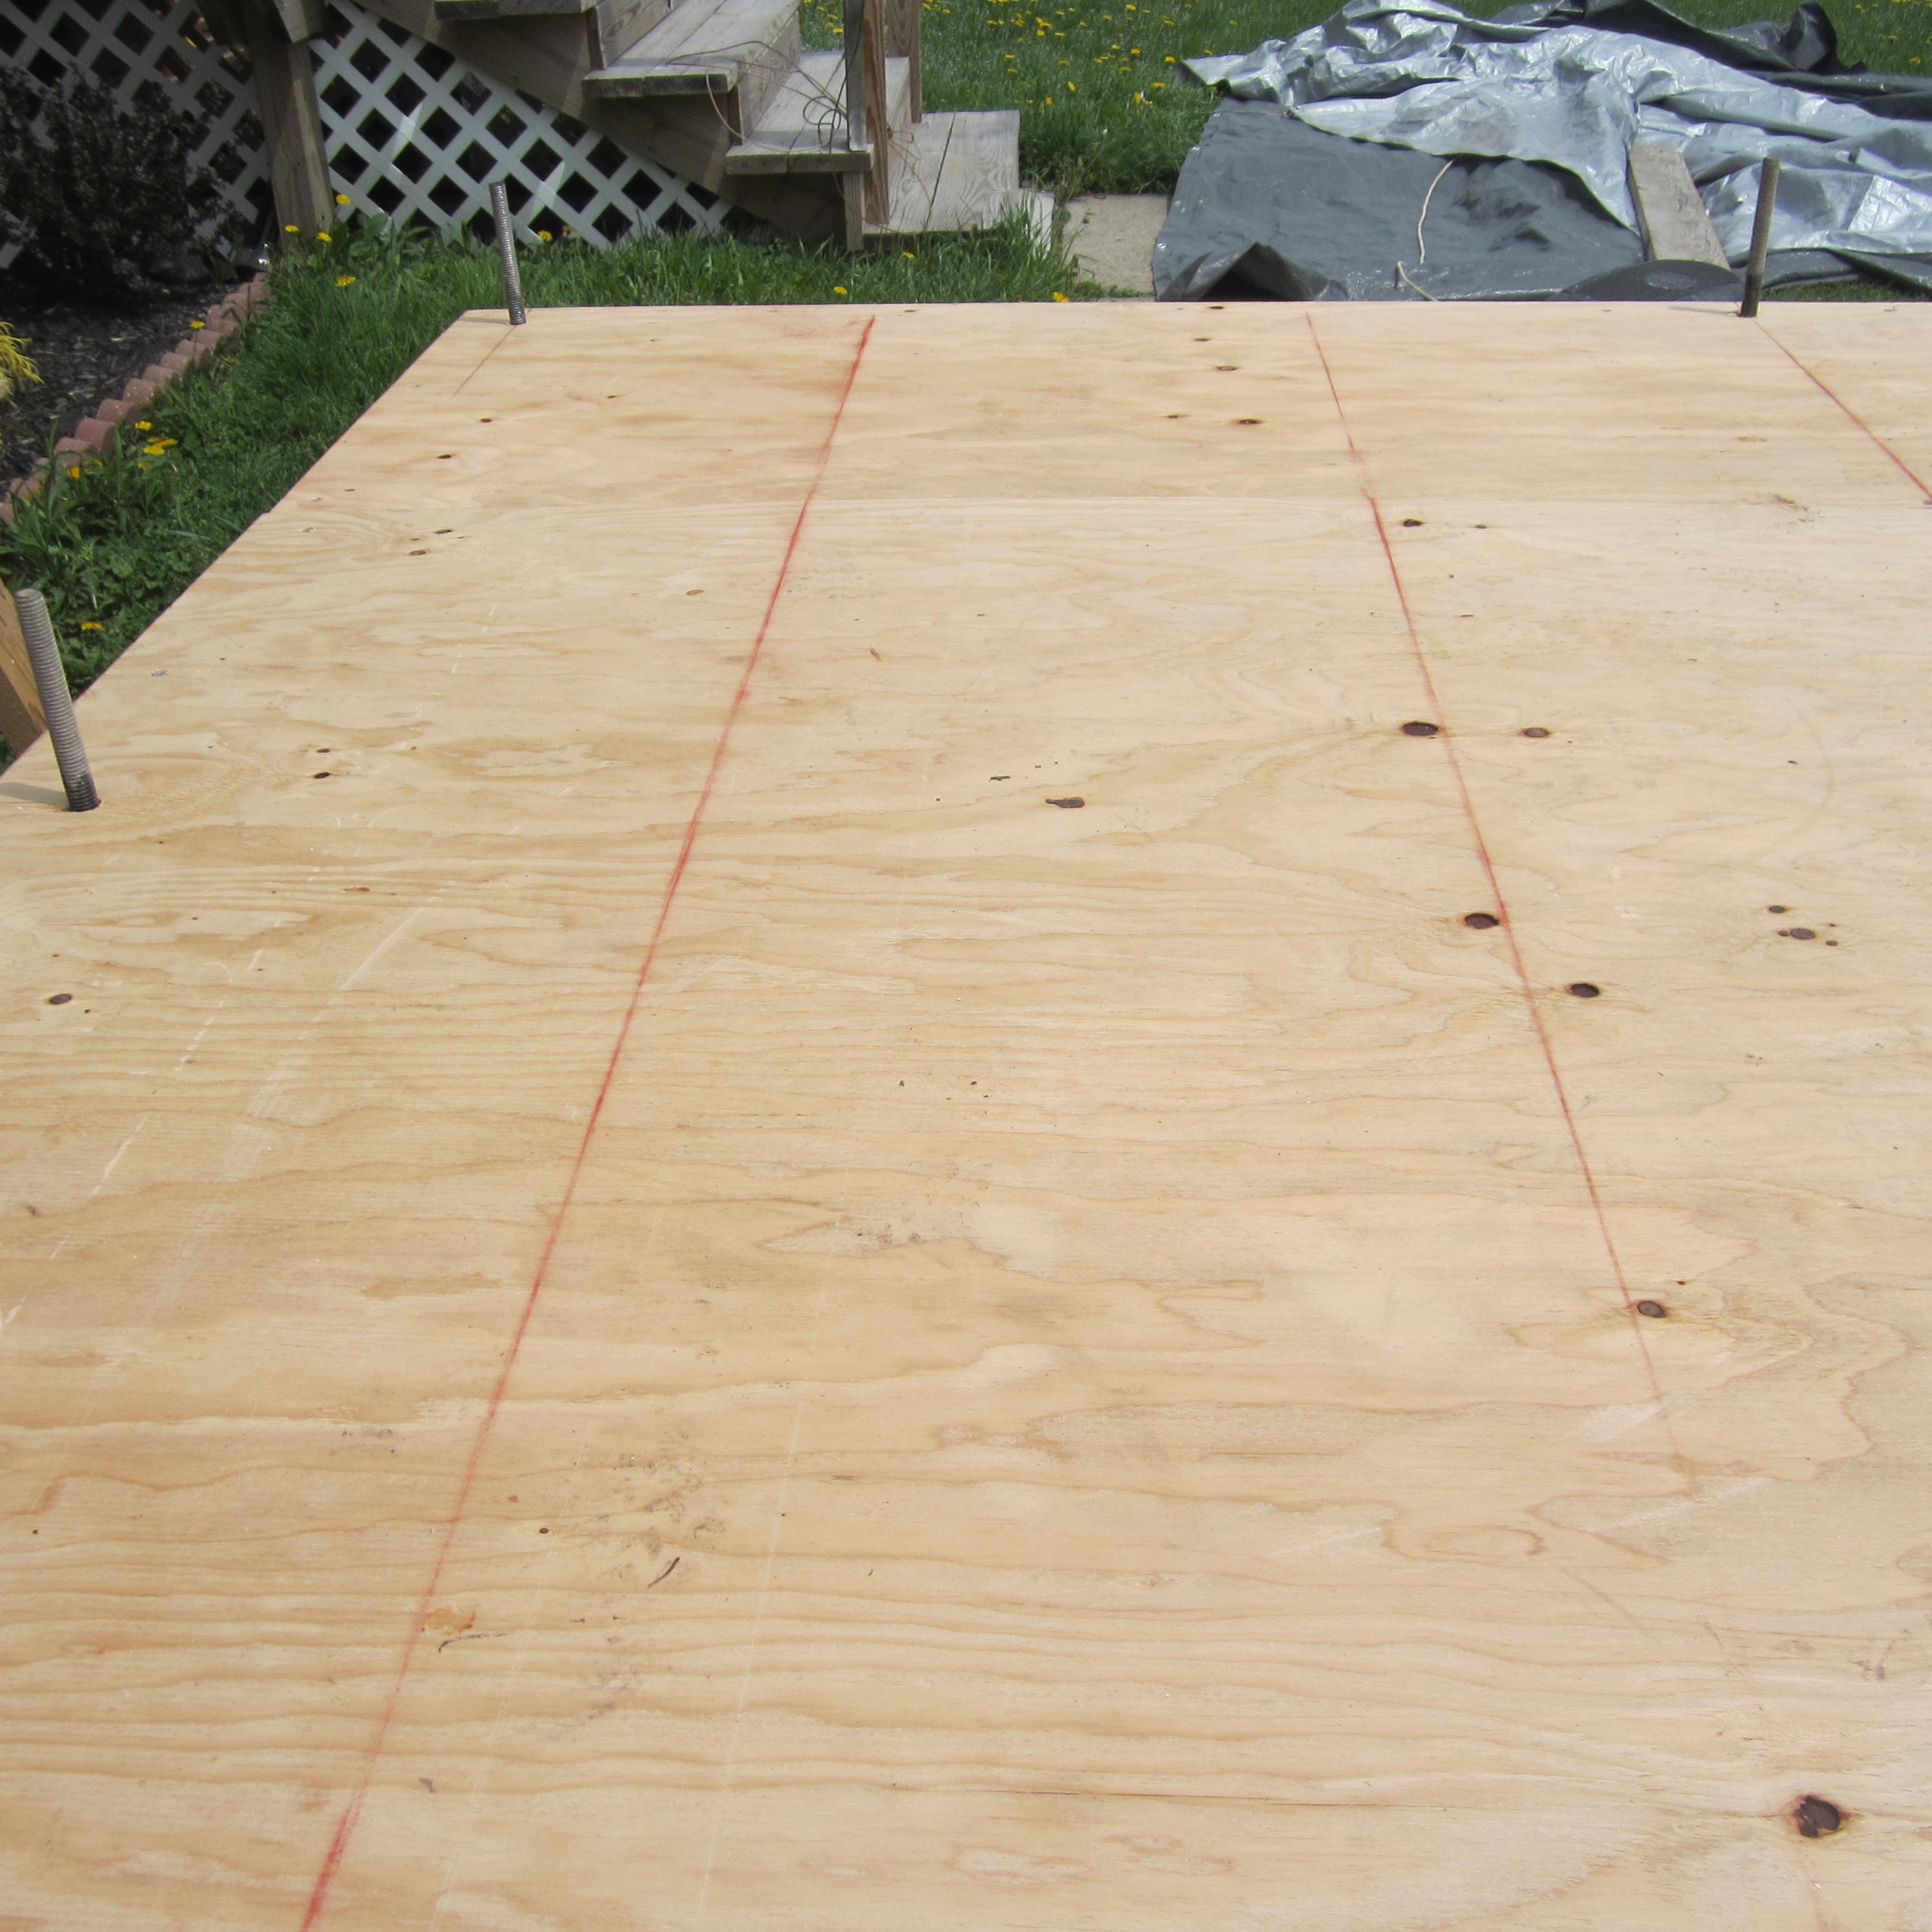
On top of the 3/4 inch plywood will be the framing of the subfloor. I will use homemade glulams and 2x4s and glue and screw them to the 3/4 inch plywood underneath. Additionally, 90 degree steel hold downs will secure everything to everything. Insulation will be foam boards–and all remaining seams will be spray foamed in. I’ll use 16 inch on center joists–this may be a waste of wood–but I’m playing all of my structural integrity cards.
Top Bun: 1/2″ plywood
On top of the framing will be only 1/2 inch thick plywood. Because the insulation is rigid, 3/4 inch plywood on top wasn’t necessary. All seams and joints will be caulked or siliconed for top notch air sealing (one of the most important, if not the most, energy efficient measures for a house). This plywood layer will be glued and screwed to the framing.
Side of Chips: The Welded Threaded Rod
Choosing the way to bolt the trailer was stressful. We didn’t use bolts because our steel is 6 inches thick and the subfloor was 6 1/2 inches; buying 13 inch bolts would have been expensive; however, it’s a good way to prevent welding cost (unless you weld them yourself–threaded rod is cheaper). We placed the bolts in obvious spots: corners, near the wheel wells, and in-between those areas. We decided to weld the bolts (threaded rod) for added strength. We’ll use Simpson’s HTT5 hold downs with the bolts, so that’s a huge cost in itself. Although on a tight budget, these were the areas we wanted to spend our money.
Future post will have detailed specifics on each of these sandwich steps. Yum, yum.
The reins are ours,
Chris