Warning: mkdir(): No such file or directory in /var/www/vhosts/oneidatrail.com/httpdocs/app/plugins/photo-gallery/framework/BWGOptions.php on line 371
Design Archives - Page 3 of 4 - Oneida Trail
Menu

Establishing a Garden

<img class="wp-image-637 size-full" src="http://www.oneidatrail find out here now.com/app/uploads/2014/04/garden-pic.jpg” alt=”” width=”863″ height=”421″ srcset=”http://www.oneidatrail.com/app/uploads/2014/04/garden-pic.jpg 863w, http://www.oneidatrail.com/app/uploads/2014/04/garden-pic-300×146.jpg 300w” sizes=”(max-width: 863px) 100vw, 863px” />
Garden Established

Garden Resurgence

Soul-comfortingly, we reinstated garden space where my grandmother used to have her garden. Constantly, I’m drawn back to the skills and homesteading choices of her generation. Where did so many baby-boomers and Generation X people go wrong? Oh yea…selling method marketing began in their generations.

Poop Panic

With a truckload of raunchy smelling horse manure, Michelle stares wide-eyed at Chris and says, “We got to dump this in the woods.”

Materials List:

  • Framing Lumber: 2x6s: Cedar, un-treated & rot resistant… or not or Hugelkurtur beds
  • 25 Exterior screws: 3”
  • Soil: Green Compost, Municipality’s Compost, Local Manure
  • Fence Posts
  • Rabbit or Deer Fencing
  • Cardboard

Tools:

  • Drill/Impact Driver
  • Measuring Tape
  • Cutting Saw: circular saw, miter saw, etc.
  • Level

Game Plan:

  • Use un-treated wood: cedar would be nice…
  • Provide protection (grid setup easy to fence in)
  • As beginners, have a large but manageable space
  • Use raised beds: neat, provides moisture retention, easy planning
  • High sunlight location during the day
  • Mostly leveled surface
  • Four raised beds: 4’ x 10’

Savvy Salvaging

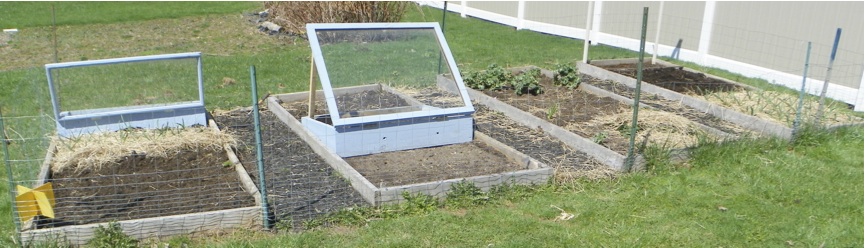
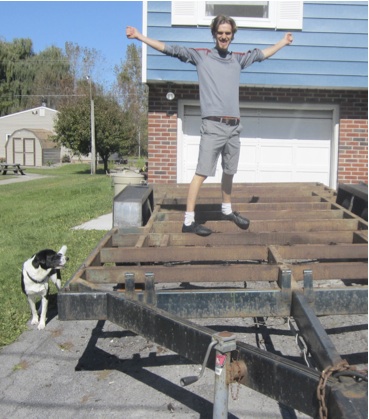
First, we scored some old framing lumber from Pa. He assured us it wasn’t pressure treated. They were pretty beat up non-cedar 2x6s, so they probably won’t last very long, but we couldn’t beat the “price.” After three seasons, they are still well in tact. We decided to create four 4’ x 10’ beds. Four foot is a little wide in retrospect; I’d go with 42” wide beds if I did it again.

Trick: Put cupcakes near garden bed project. Associate cupcakes with garden work.

In a maximized sun location, we setup a board and put the level on it to gauge the land’s tilt. It was tilted slightly, so we shoveled out one end a bit to get it close—we didn’t worry too much about being completely level. Then we drilled and screwed the boards into each other: two screws per joint.

Free Manure

On craigslist, we found someone giving aged horse manure for free with a nominal charge to dump it on your truck or trailer, so we borrowed pa’s truck and headed over. It turned out to be an old friend from high school, so the dumping of the shit was…free. =). Make sure the compost is aged for at least a year—two years to be safer. It was still really stinky, and we had a massive panic attack that we got the wrong stuff and almost tried to dump it in the nearby woods. Thankfully, it ended up working very well when we mixed it with peat moss and humus. Oh yea! Make sure you put, layer, and water down some cardboard to smother the grass before adding your soil. Don’t get tricked into buying fabric sheets.

We were weed-whacking the walkways for a while. This was dumb, so we layered wet cardboard then topped it with woodchips from our municipality’s composting service. It’s a nice organized look. Me likes!

Upgrades: Mulched walkways, fitted cold frames, and straw weed cover.

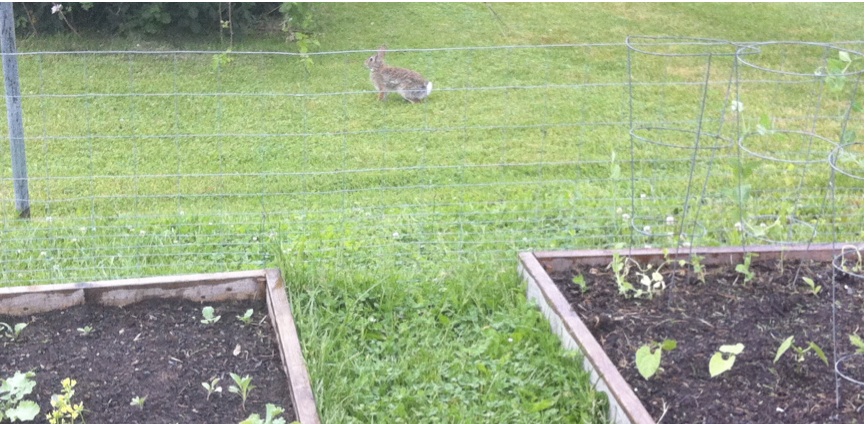
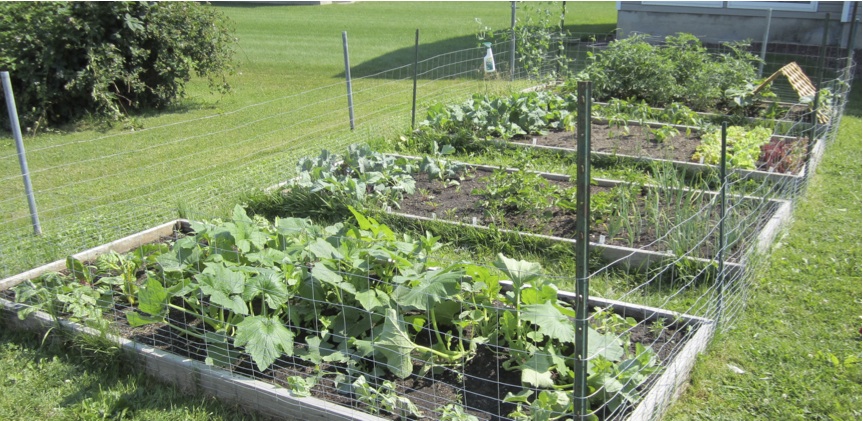
We initially didn’t plan on having a fence, but the rabbits struck quickly in the game, forcing us to reconsider. Deer are not an issue here, so we were able to buy some fence poles off of craigslist and bought some rabbit fencing from the hardware store. We haven’t had a problem since. The rabbit fence is short enough for us youngsters to hop over, but we did extend it in one area with a moveable stake that opens the area.

Haha, B!@#@! We win this time!

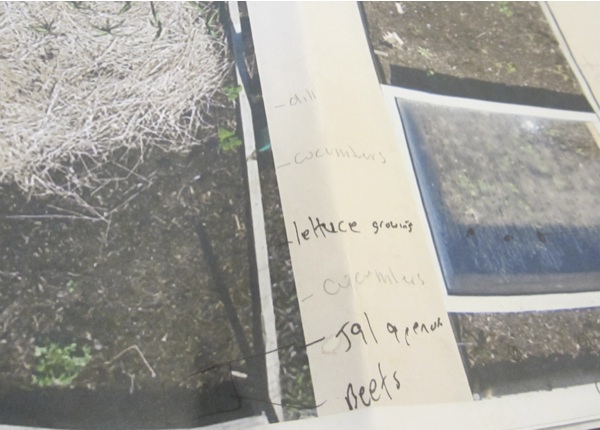
We changed from graph paper to garden bed pictures to organize our crop rotation and planting. Take pictures then crop and scale the images to one page. Then you can just write where and what you planted. We change pen color to delineate a different planting time in the season. Pictures are a great way to document your growing season and plant maturity rates during the year.

Use an image editor or Preview to document and manage your plantings.

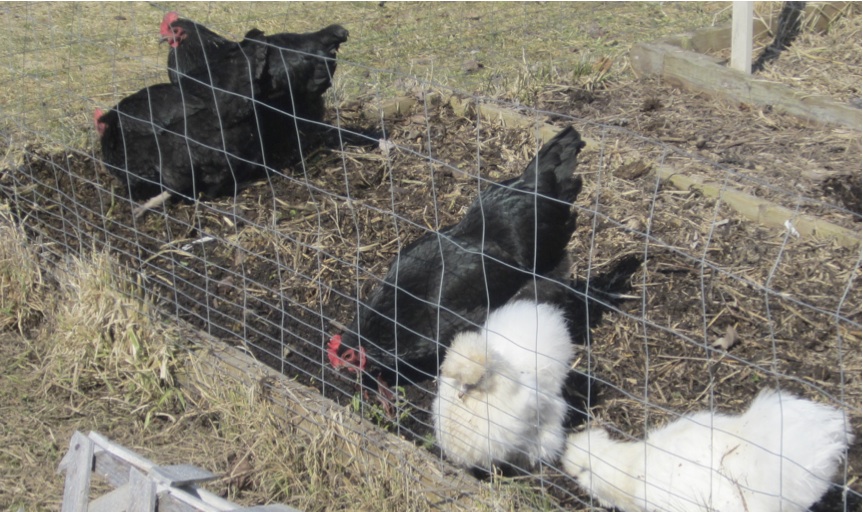
This year, I let the chickens do some of the work. Although a slight charade catching them (as always!), they were placed in the beds to till the area and find some slugs. The next day I added our somewhat finished compost from last year and they did a solid job spreading it out.

Spring: Chickens digging up slugs, spreading compost, and tilling beds.

The reins are ours,

Chris

Reflections, Hindsight, and Alterations:

  • Permaculture: Place garden in a high traffic area. For example, between your driveway and front door to maximize interaction. Pick stuff for dinner on your way in! It’s not a trudge to the corner of your lot to maintain your garden.
  • Permaculture: Use Hugelkurtur beds – woody debris and logs underneath layered organic matter. This skips the wood framed beds, saves money on materials, and utilizes local shrub & fallen tree waste (if applicable in your area).
  • Permaculture: Use more synergistic plants and food forest layouts.
  • Do 3.5’ wide beds: otherwise, it’s a pretty large space to hop over.
  • Instead of getting the manure, peat moss, and humus, we should have just gotten yards of certified compost from our municipality service (OCRRA compost). It would have been cheaper and less work. They offer wood chips to cover your plants and prevent weed maintenance, too! $15 for six yards of either compost or wood chips; you can mix and match. A yard is about a truck bed load.

Resources:


Tiny House Planning: Window Bonanza: Deal of the Century Two

Tiny House Financial Stranger Angel

While purchasing new windows at Home Depot, a man says, “How much you paying for those five windows?” “100 each.” “Did you see the ad on craigslist on Teall Ave? Bet they got your size windows there.” “I’ll check it out.” Although I spent $500 for the windows I needed to get, I took the guys advice…and found all five similar size windows for $100 total! Brought the depot ones back! $400 bucks saved that day. Thank you tiny house angel.

Window Bonanza

That stranger didn’t just lead me to $400 worth of savings–he lead me to securing windows for the house and the companion studio! We actually may have too many windows now, haha. Crazy! With a projected window cost between $800-3800 dollars, we have paid a total of $266 for twelve windows and a skylight—that’s $20.50 per window. We also have obtained our eleven windows for the companion studio at only $226–that’s 20.50 per window as well. Mainly, the score entailed showcase windows—a thing for tiny house builders to seek out.

Craigslist/Angel Advice Window Score

Although a stranger pushed me to check out the windows on Teall Ave, it was an ad on craigslist I glanced over. 80% of our windows and doors came from craigslist and the other 20% through Michelle’s builder/part-time boss’ network. Overall, the windows acquired ranged from $20-60 on craigslist after wheelin’ and dealin’ Extra resources.

Out of Business = Good Business

Leo A. Kline, a home improvement specialist since 1947, was going out of business, and it was good business for us. A kind man named Paul offered us a lot of deals for eighteen windows and a new sliding glass door (for the companion studio). Pa, my uncle and I went to pick up the windows and we also had to take down a display case as part of the deal with Paul. Scrapped the aluminum from the display case for $55, too. Four of the windows and the door are tempered glass, an added bonus. We paid around $16 per window. After consulting some tiny house sites, I found that a lot of people chose not to use tempered glass windows–Tiny Tack home included. Although it’s a good idea, it depends on how much you plan to travel and it’s too expensive for most tiny homebuilders, so it’s not fretted about.

Less Awesome

I bought an aluminum clad tempered glass door from someone for $100. Like an idiot, I didn’t inspect it well, and the wood was rotting at the bottom from the side I didn’t look at! Time to learn how to deal with rotting wood…at least I’ll have a winter project before the spring.

Needs some TLC.
Needs some TLC
How did I miss this?


The reins are ours,

Chris

Categories: Design, People

Tiny House Trailer: Tiny Journey: Trailer Ahoy!

The Chosen One: A Beauty?

Craigslist Addict Finds Deal

Along with other tiny house builders, we view the trailer, the foundation, as a crucial element. Now, how do you find a structurally sound trailer that fits the bill that doesn’t cost over $4500? You spend hours and hours on craigslist—that’s how! We found quite the gem with the essentials.

Time to Write the District Attorney

Bringing the trailer home, we pull over to double check that the trailer is pulling okay and nothing is amiss. Police officer notices us and pulls over to check if everything is okay. “Wait, the trailer isn’t registered?” Ticket written. “Shit.”

Heading North

We feel lucky with our trailer. It’s a lot of steel. It’s rated for 10k pounds lipitor dosage. It has strong wheel well covers, an eight and a half feet width (max), bed in-between the wheels, double axles, and two foot on center steel framing. We’d like to thank Gary Cooper, an aspiring nurse, for cutting us a deal.

Although listed at $3200 and built at around $6000, we scored the trailer for $2600; he liked our idea. Thanks again Gary! Although it contained quite a bit of surface rust, the steel was very sound. After registration, flashing, materials, and paint, it will probably be around $3000 for the trailer—not counting a lot of labor!  Will have to add chiropractor fees to all these numbers later on!

Celebrate Good Times
Celebrate good times, yay!: Charlotte is slightly amused.

Here was my search criteria:

  • Flatbed trailer, utility trailer, car trailer (no beaver tail)
  • GVWR: 7,000 lbs or 10,000 lbs (3500 per axle at least)
  • GVWR: Gross Vehicle Weight Rating: shoot for the 10k.

Questions for Craigslisters:

  • Pounds per axle?
  • Height of framing from the ground?
  • Electric brakes on both axles? Auto stop brakes?
  • Build a house on it? Any known issues?
  • Hitch Size?
  • Sweet ass trailer?

Visit the Daedalus Project’s trailer page for a thorough trailer purchasing, selecting, and searching guide. I also recommend watching videos and information about finding the right trailer on tumbleweedhouses.com. There seems to be four options: recycle an old RV, find a used utility trailer, custom order a trailer, or buy a well-designed tiny house company trailer. Specialty designed tiny house trailers have a lot of nice perks, but don’t rule out repurposing an older trailer; don’t forgot the energy use prevented with the ladder.

Cost for a New Yorker: For a twenty-foot tiny house trailer delivered to New York, it would have cost $4500-5500. Hopefully, you have a local option like California’s Tumble Weed Houses ($4500) or Florida and Colorado’s Tiny Home Builders ($3450). I’ve read that calling a trailer fabricating company directly can be very affordable.

Other tiny house blogs have been innumerably helpful. Please check out the resources below for some highlighted shout-outs.

The reins are ours,
Chris

Reflections, Hindsight, and Alterations

  • If we had a local new purchase option, we could have picked up the trailer for only $500 more new from Tiny Home Builders, but repurposing an older trailer has it’s own value—fits with our goals.
  • Would like to have experimented with renovating an old camper but the steel framing can be pretty weak—unless you can reinforce it and add more joists or steel tubing. View this page for a very awesome breakdown of recycling an old trailer: http://tinyhouseblog.com/tiny-house-concept/recycling-old-rv-trailers/

Resources

Categories: Design